
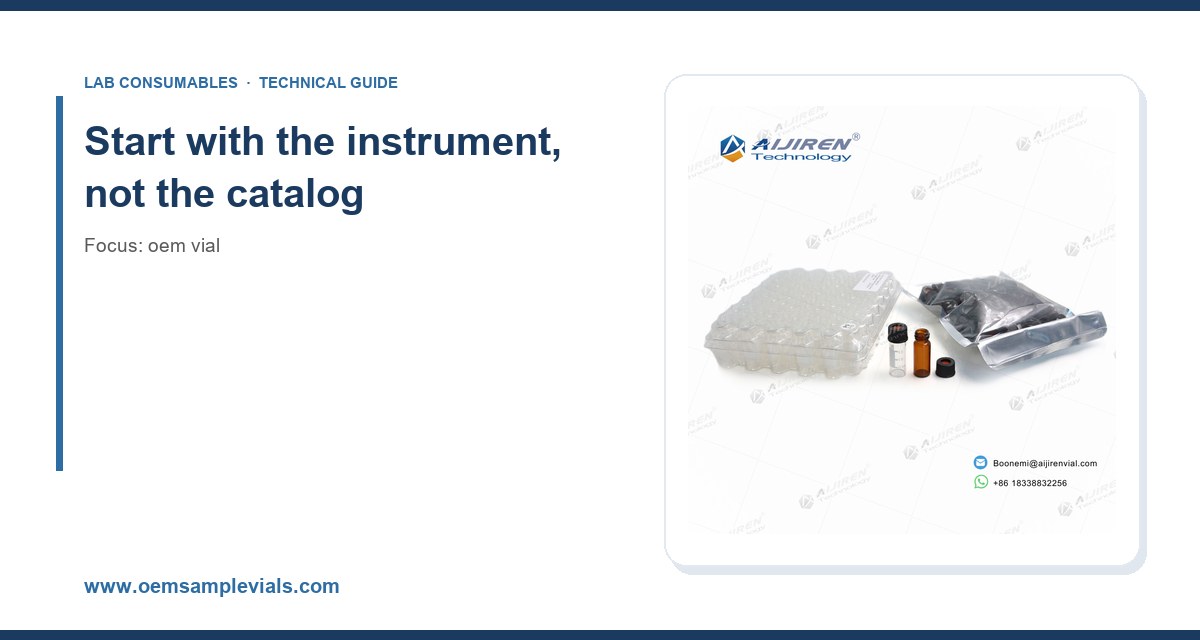
I have watched a lab lose three weeks of work because someone bought the wrong vial. The autosampler needle punched through a thin septum, a fragment dropped into the sample, and the HPLC ran a beautiful chromatogram of septum rubber. Nobody caught it until the QC review. That experience, repeated a few times across two decades of running consumables supply, taught me that vial selection is not a commodity decision. It is an analytical decision that happens to be packaged as a purchasing one.
This guide is what I wish I had handed that lab manager: the dimensions that actually matter, the septa chemistry that survives your solvent, the closure torque that does not crack the crimp, and the questions to ask your OEM supplier before you sign a blanket PO.
Every vial decision begins with the autosampler sitting on your bench. The sampler defines the physical envelope: maximum body diameter, maximum height, the depth the needle travels, and the gripper geometry that picks the vial out of the tray. Get any of those wrong and you have a jam, a bent needle, or a “no vial detected” error at 2 a.m. during an unattended sequence.
Standard 12 x 32 mm vials dominate HPLC and GC autosamplers for a reason. That footprint fits the trays on the Agilent 1260/1290 series, the Thermo Scientific Vanquish and UltiMate lines, Shimadzu Nexera, and Waters Alliance systems. If you are running any of those platforms, the 12 x 32 mm format is your default and you should need a specific reason to leave it. The common exceptions are 11 mm crimp vials for older GC heads and 6, 8, or 9 mm formats for micro-volume work where you are injecting 1 to 5 µL from a 100 µL sample.
Measure these four dimensions before you order
- Body diameter: 12.0 mm nominal for standard autosamplers. Tolerance matters. A vial that measures 12.3 mm will bind in a tray machined for 12.0 mm.
- Height: 32 mm for standard screw and crimp vials. Short 11 mm neck vials are 32 mm overall; taller 15 mm neck versions push to 32 mm as well but change the septum position relative to the needle.
- Neck finish: 8-425 (8 mm screw), 9 mm screw, 10-425, 11 mm crimp, 13-425, or 18 mm headspace. The number is the thread or crimp diameter in millimeters; the second number is the GPI thread specification.
- Internal volume: 1.5 mL, 2 mL, 4 mL, 10 mL, 20 mL headspace. Pick the smallest volume that holds your sample plus the autosampler’s minimum draw. Dead volume in a 2 mL vial with a 1.5 mL fill is wasted sample and a wider solvent front.
If you are unsure which neck finish your instrument accepts, pull the manual and search for “vial dimensions” rather than guessing. The GPI (Glass Packaging Institute) thread standards are published and the instrument vendors list compliant part numbers. A reputable OEM vial supplier will publish the GPI number on the spec sheet; if they cannot, walk away.
Glass chemistry: type I, type II, or plastic
The glass is not inert decoration. It is a surface your analyte touches for minutes to hours, and the wrong glass will adsorb, leach, or catalyze reactions. Here is the practical breakdown.
Type I borosilicate (borosilicate 3.3)
This is the default for HPLC, GC, LC-MS, and most pharmaceutical work. Low alkali release, high hydrolytic resistance per USP <660> and ISO 3585, and it tolerates autoclaving and most organic solvents. Use type I for anything where trace metals, pH-sensitive analytes, or method validation under ICH Q2(R2) matter. Expect USP <660> Type I classification, a coefficient of expansion around 3.3 x 10⁻⁶ /K, and a maximum working temperature near 500 °C for short exposures (though you will never take a septum that hot).
Type II treated soda-lime
Surface-dealkalized soda-lime glass. Cheaper, adequate for pH-neutral aqueous samples, and common in low-cost environmental and food testing. It will not survive strongly alkaline conditions or long contact with chelating analytes. If your method includes EDTA, citrate, or anything that grabs calcium or sodium, do not put it in type II.
Amber vs clear
Amber glass blocks UV below roughly 400 nm and protects light-sensitive analytes (vitamins, some pesticides, many pharmaceuticals). It costs 10 to 20 percent more and complicates visual inspection. Use it when your method says so; skip it otherwise. Clear glass lets you see particulates and phase separation, which has saved more than one injection.
When plastic wins
Polypropylene vials are the right answer for trace metal analysis (no silica surface to leach sodium or boron), for fluoride and other species that etch glass, and for biological samples where protein binding to glass is a problem. They are the wrong answer for volatile organics (permeation) and for anything requiring a crimp seal. I keep both on the shelf and pick per method.
Septum selection: the failure mode that ruins runs
Septum choice is where I see the most expensive mistakes. The septum is the only part of the vial that gets punctured, and it is the part most likely to fail silently. A coring septum sheds particles into the sample; a poorly cured septum bleeds siloxanes into the GC; a septum that is too hard will not reseal and your volatile analytes escape.
The four septum materials you will actually use
- Silicone (pure): Excellent reseal, high puncture count (often 50 to 100 punctures at 22-gauge), but high bleed at GC inlet temperatures above 250 °C. Best for HPLC and LC-MS, not for hot GC inlets.
- Silicone with PTFE facing: The PTFE film faces the sample and blocks bleed and interaction. Standard for HPLC, LC-MS, and headspace. Puncture count drops because the PTFE does not reseal as well as silicone, so plan on 20 to 30 punctures per septum in autosampler use.
- Bonded silicone/PTFE (laminated): The workhorse for 95 percent of HPLC work. Good chemical resistance, low extractables, 20 to 50 punctures depending on needle gauge. This is what I specify unless the method says otherwise.
- Butyl or bromobutyl rubber: Low gas permeability, used for headspace and for samples where oxygen ingress matters. Higher hardness, fewer punctures (10 to 20), and not appropriate for most HPLC because of extractables.
For headspace GC, the septum must hold pressure. Butyl or a PTFE-faced butyl with a magnetic or crimp closure is standard. If you are running EPA SW-846 methods like 8260 for volatiles, the septum is part of the analytical chain and should be specified in the SOP, not left to purchasing.
Septum thickness and durometer
Standard septa run 0.9 to 1.3 mm thick for 8 and 9 mm screw closures and 3 mm for 20 mm headspace crimp. Durometer (hardness) typically falls between 45 and 60 Shore A for silicone. Softer septa reseal better but core more easily at high needle speeds; harder septa resist coring but leak. If your autosampler uses a blunt or side-port needle, ask the supplier for a septum rated for that geometry. Side-port needles slice rather than pierce and will core a soft septum in under 20 injections.
Closures, crimps, and torque: the numbers that prevent leaks
The closure is half the seal. A perfect vial with a loose cap leaks; a perfect vial with an over-torqued cap cracks the neck. Here are the working values I use.
Screw caps
For 9 mm screw-thread vials, the practical torque range is 0.6 to 1.2 N·m (roughly 5 to 10 in-lb) with a manual capper. Above 1.5 N·m you start to deform the thread and the cap backs off during the run. Below 0.5 N·m the septum does not compress enough and you get evaporation loss. For 8-425 vials, stay at the lower end, 0.5 to 0.8 N·m. A torque screwdriver costs less than a single failed sequence; buy one and calibrate it annually. For a broader catalog of compatible caps and septa, see Vial Closures.
Crimp caps
For 11 mm aluminum crimp seals, the standard is a two-jaw or four-jaw crimper set to the instrument vendor’s specification. Crimp height after sealing should be 5.5 to 6.0 mm for 11 mm seals; a crimp that is too tall will not seal, and one that is too short crushes the septum. Check with a crimp gauge every 100 vials. For 20 mm headspace crimps, the target is a uniform crimp with no visible skew; a 20 mm crimper set to the wrong height will leak at the first pressure cycle in the headspace sampler.
Magnetic and snap caps
Magnetic caps are convenient for robotic samplers but the magnet strength varies by supplier. If your sampler drops vials, measure the holding force. Snap caps reseal poorly after the first open; do not reuse them for anything quantitative.
Certification and documentation: what to demand
If you are running regulated work (pharma under 21 CFR Part 211, clinical under CLIA, environmental under NELAP), the vial is a critical consumable and needs a paper trail. I ask for the following from any OEM vial supplier before the first order:
- Certificate of analysis per lot, with dimensional conformance to the drawing (diameter, height, neck ID, wall thickness).
- Extractables data: at minimum, a solvent extractable test in the relevant solvent (acetonitrile, methanol, water) with total extractables reported in µg/vial. For LC-MS work, ask for the mass range covered.
- USP <660> glass classification and hydrolytic resistance results.
- Septum specification: material, durometer, thickness, and any silicone oil or talc treatment. Untreated septa are preferable for MS work.
- Trace metals data if you are doing ICP-MS or elemental analysis. Typical specs are <10 ppb for lead, <5 ppb for cadmium, and similar for other regulated elements.
- Change control notification: a written commitment to notify you before any change in glass source, septum compound, or manufacturing site. This is the single most important clause in a vial contract, and many suppliers will not sign it unless you ask.
If you need independent verification, send a lot to an analytical testing lab for extractables by LC-MS and GC-MS. A single screening run on a new supplier has caught problems that no certificate revealed.
A decision checklist with concrete parameters
Here is the table I use when a lab asks me to specify a vial. Work top to bottom and stop when you have a match.
- Step 1, instrument: Confirm autosampler model. Standard format is 12 x 32 mm. If micro-volume (< 100 µL), consider 6 or 9 mm. If headspace, go to 20 mm crimp.
- Step 2, volume: 2 mL for standard HPLC/GC; 1.5 mL for LC-MS with low-volume inserts; 4 mL or 10 mL for prep and fraction collection; 20 mL for headspace.
- Step 3, glass: Type I borosilicate for regulated and pH-sensitive work; type II for neutral aqueous; polypropylene for trace metals and fluoride; amber for light-sensitive analytes.
- Step 4, closure: 9 mm screw for most HPLC; 11 mm crimp for GC and older autosamplers; 8-425 for narrow-neck applications; 18 mm magnetic for headspace robots.
- Step 5, septum: Bonded silicone/PTFE for HPLC and LC-MS; pure silicone for high-puncture-count autosamplers at ambient temperature; butyl for headspace; PTFE-faced butyl for volatiles.
- Step 6, torque: 0.6 to 1.2 N·m for 9 mm screw; 0.5 to 0.8 N·m for 8-425; crimp height 5.5 to 6.0 mm for 11 mm crimp.
- Step 7, documentation: COA per lot, extractables data, USP <660> classification, change control clause.
- Step 8, supply: Lead time under 4 weeks, minimum order quantity that fits your consumption, and a second source qualified.
For reference methods and technical notes on how septa and vials behave in real separations, the vendor resources at Restek and Agilent are worth bookmarking. The Thermo Fisher chromatography library also has useful compatibility charts for closures and septa.
Operational precautions that save runs
Selection gets you a good vial. Handling keeps it good. These are the habits I enforce in my own operation.
Never reuse a septum
A septum that has been punctured twice has lost its reseal. Reusing septa is the most common cause of evaporation loss and ghost peaks I see in contract labs. Cost of a septum is cents; cost of a repeat sequence is hours.
Pre-rinse and pre-condition
For trace-level work, rinse vials with the sample solvent before filling. For GC, pre-condition septa at the inlet temperature for 30 minutes before the first injection to drive off residual volatiles. This alone has cut baseline noise by 40 percent in my experience on silicone septa.
Fill volume and headspace
Fill to no more than 75 percent of nominal volume for HPLC (1.5 mL in a 2 mL vial) to leave headspace for the autosampler needle and to prevent siphoning. For headspace GC, fill to 50 percent and keep the vial upright; a tilted vial in the tray will inject the wrong phase.
Storage and lot control
Store vials in the original sealed bag, away from solvent vapors and direct sunlight. Amber vials still degrade under UV. Rotate stock first-in-first-out and record lot numbers in your LIMS. When a problem appears, the first question is always “what lot?” and the answer should take 30 seconds, not 30 minutes.
Autosampler needle care
Check needle straightness monthly. A bent needle cores septa and will contaminate every vial it touches. Replace needles on the manufacturer’s schedule, typically every 10,000 to 20,000 injections, or sooner if you see coring debris in the vial.
Troubleshooting checklist
When something goes wrong with a vial-related method, work through this list in order. It has solved most of the problems I have been called about.
- Ghost peaks in the blank: septum bleed or vial extractables. Swap to a PTFE-faced septum and run an extractables blank. If the peak disappears, the septum was the source.
- Lost peak area on volatiles: poor reseal or loose cap. Check torque with a screwdriver and replace septa with butyl or PTFE-faced butyl.
- Particles in the injection: coring. Inspect the septum for a visible hole; switch to a harder septum or a needle with a different geometry. Filter the sample through a 0.22 µm filter as a stopgap.
- No vial detected: dimensional non-conformance. Measure diameter and height with calipers against the drawing. A 0.3 mm oversize is enough to jam a tray.
- Leaks in headspace: crimp height out of spec. Re-crimp with a gauge and verify 5.5 to 6.0 mm for 11 mm seals.
- Adsorption of basic analytes: type II glass or a dirty vial. Switch to type I borosilicate and pre-rinse with 0.1 percent formic acid in the sample solvent.
- Metal contamination in ICP-MS: glass leaching or a contaminated septum. Switch to polypropylene vials and a PTFE-faced septum, and run a leach test on the new lot.
If a problem persists after these steps, send a sample of the suspect lot to an independent lab for extractables and dimensional analysis. That is what analytical testing services are for, and it is cheaper than a failed audit.
What I recommend
For a general-purpose HPLC or LC-MS lab running regulated methods, I specify a 12 x 32 mm, 2 mL, type I clear borosilicate vial with a 9 mm screw thread, a bonded silicone/PTFE septum, and a polypropylene cap with a PTFE liner. Torque to 0.8 N·m. That combination handles the widest range of solvents, analytes, and autosamplers, and it is the configuration I keep in stock at all times. For GC work, the same body with an 11 mm crimp and a pure silicone septum, crimped to 5.5 to 6.0 mm. For headspace, a 20 mm crimp with a butyl septum. For trace metals, polypropylene with a PTFE-faced septum.
Source from a supplier who will sign a change control clause, provide a COA per lot, and publish the GPI thread specification. That last point matters more than price. I have seen a 15 percent cost saving on vials turn into a 40 percent increase in repeat injections, and no procurement manager wants that conversation.
If you want a single starting point, the catalog at oemsamplevials.com covers the standard formats and will quote to your drawing. For closures, vialclosures.com has the caps and septa that match. And if you need to qualify a new supplier or lot, Aijiren and the independent labs in your network can run the extractables and dimensional checks that close the loop.
The short version: pick the vial from the instrument backward, not from the price list forward. Specify the septum by chemistry and puncture count, not by what is in stock. Torque to a number, not to feel. And demand the paperwork before the first injection, not after the first failed audit. That is the whole discipline, and it is worth the hour it takes to set up.
References & further reading
Related resources from our lab consumables network:
- Oem Vial at oemsamplevials.com
- Vial Closures at vialclosures.com
- Analytical Testing at labanalyticaltesting.com
- Aijiren at aijirentechinc.com
External references and standards: