
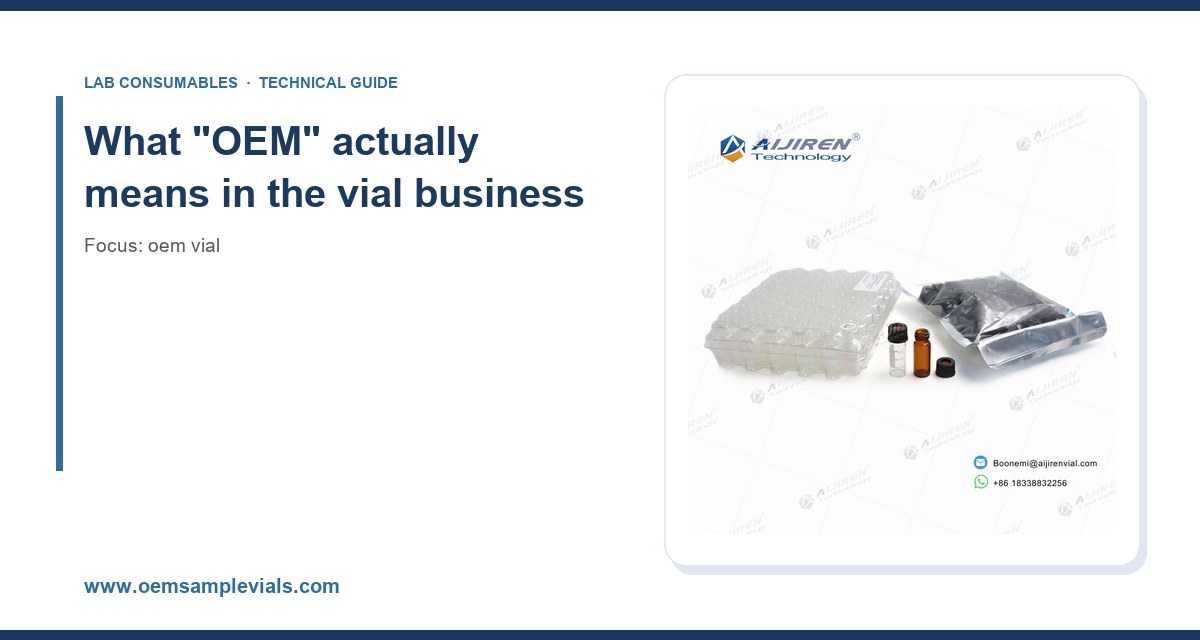
I have watched a lot of “OEM” vial programs fall apart in the same way. A procurement manager signs off on a quote that looks 30% cheaper than the incumbent, the first shipment arrives, everything passes incoming inspection, and then six weeks later the autosampler starts throwing “no vial detected” errors on one in forty samples. Or the septa coring shows up as ghost peaks at 2.1 minutes in the blank, and nobody can figure out where the contamination is coming from because the vial itself was never suspected. By the time the root cause is traced back to a mold with the wrong thread pitch or a septum batch with the wrong durometer, you have already burned three weeks of analyst time and a re-validation.
The gap between a reliable OEM vial manufacturer and a cheap one is rarely visible on the invoice. It lives in the tooling tolerances, the incoming resin certificates, the dimensional audit frequency, and whether the factory will actually run your part number under your drawing or just relabel a stock catalog item. Below is what I look for when I qualify a supplier, with the numbers I actually use.
The word gets used loosely. In practice there are three tiers of supplier, and only one of them is doing real OEM work.
- Tier 1: Catalog relabeler. Buys finished vials from a converter, prints your logo on the carton. No control over glass chemistry, no control over the septum compound, no ability to hold a dimensional tolerance tighter than whatever the converter ships.
- Tier 2: Contract molder/assembler. Makes the vial and cap to a drawing, but sources glass tubing and septum sheet from third parties without full traceability. Can hit dimensions, has limited ability to investigate a failure that originates upstream.
- Tier 3: Vertically integrated OEM. Controls glass conversion (or has a locked tubing supply), compounds or specifies the septum elastomer, molds the cap, assembles and packs under its own QMS, and can show you the batch records. This is the tier that can actually solve a coring complaint instead of just replacing cartons.
When you evaluate a supplier for Oem Vial programs, ask directly which tier they are. Ask to see the glass tubing certificate of analysis and the septum compound formulation sheet (they can redact the cure package, but the base polymer and durometer must be stated). A Tier 1 supplier will stall on both questions.
Materials: where most failures are actually born
Glass chemistry and the USP Type question
Almost every HPLC and GC vial in the world is made from borosilicate glass, but “borosilicate” is not a specification. The relevant standard is USP <660>, which classifies glass into Types I, II, and III. Type I borosilicate (expansion coefficient around 3.3 × 10⁻⁶ /°C) is what you want for anything that will see pH extremes, autoclaving, or long-term storage of aqueous standards. Type III soda-lime is cheaper and fine for short-duration, near-neutral work, but it leaches alkali into aqueous samples over time and will shift pH in an unbuffered mobile phase standard within days.
The failure mode I see most often is not the wrong glass type. It is inconsistent glass type within a lot. A supplier running Type I on Monday and a soda-lime blend on Friday will produce vials that look identical and behave differently. Ask for the hydrolytic resistance test result per lot (USP <660> specifies titration of the leachate; Type I should come in under 0.1 mL of 0.01 M HCl per 10 mL of extract). If the supplier cannot produce that number per lot, they are not testing it.
Septum elastomer: the part everyone underestimates
The septum is where 80% of chromatography problems that get blamed on the column actually originate. The two common compounds are silicone and silicone/PTFE laminate.
Bare silicone is soft, reseals well, and is inexpensive. It is also permeable to oxygen and moisture and will absorb volatile analytes. For GC headspace work it is the wrong choice unless you are running a laminate. The standard for HPLC and most GC autosamplers is a silicone core with a PTFE face on the sample side. The PTFE provides the chemical barrier; the silicone provides the reseal. Thickness matters: a 1.0 mm septum is the workhorse for 2 mL vials, while 0.9 mm or thinner is used where needle penetration depth is tight.
Durometer is the number that separates good septa from bad ones. A reliable silicone core runs 45 to 55 Shore A. Below 40 Shore A, the septum extrudes into the vial neck under autosampler needle pressure and can be punched through into the sample. Above 60 Shore A, the needle requires more force to penetrate, coring risk rises, and the septum may not reseal after multiple injections.
The puncture count is the other spec to demand. A properly formulated 1.0 mm silicone/PTFE septum should hold at least 3 to 5 clean punctures at the same point before coring becomes measurable, and many premium grades hold 10 or more. Ask for the puncture test data. If the supplier quotes “unlimited punctures,” they are not testing.
For a deeper look at how cap and septum geometry interact with autosampler needles, the Vial Closures reference library is worth a read before you write your drawing.
Dimensional control: the numbers that matter
Autosamplers are mechanical devices with finite tolerance. A vial that is 0.3 mm out of spec on neck diameter will jam in the tray. A cap that is 0.2 mm out on thread pitch will cross-thread under torque and leak. The dimensions I put on every OEM drawing are below, with the tolerances I consider non-negotiable.
2 mL vial critical dimensions
- Body OD: 12.0 mm ± 0.1 mm (this is the dimension that must clear the autosampler tray)
- Height (crimp): 32.0 mm ± 0.3 mm; height (screw): 32.0 mm ± 0.3 mm
- Neck OD: 11.0 mm ± 0.15 mm for crimp; 9.0 mm ± 0.15 mm for 9 mm screw thread
- Neck ID: 6.0 mm ± 0.1 mm (must clear the needle and allow septum seating)
- Bottom thickness: 1.0 mm minimum (thin bottoms crack under autosampler needle impact)
- Concentricity: 0.15 mm TIR maximum (off-center necks cause needle deflection and coring)
Thread specifications follow the GPI 9 mm (Glass Packaging Institute) standard for screw-thread vials, which is the de facto reference for autosampler compatibility across Agilent, Waters, Shimadzu, and Thermo instruments. If a supplier cannot tell you their thread conforms to GPI 9 mm, they are molding to a copy of a copy, and the tolerance stack will bite you eventually.
Caps and closures
Crimp caps should be aluminum with a 0.25 to 0.30 mm wall thickness and a magnetic or non-magnetic option depending on the autosampler. Screw caps are usually polypropylene with a PTFE-faced silicone liner or a bonded septum. The torque spec for a 9 mm screw cap is 0.4 to 0.6 N·m; above 0.7 N·m you deform the septum and create a coring risk, below 0.3 N·m you get evaporation loss over a 24-hour run.
If you are running a long sequence, buy a torque screwdriver and check caps on incoming inspection. I have seen whole lots fail at 0.9 N·m because the molder changed the cap skirt angle without telling anyone.
QC: what a real incoming and in-process program looks like
Every supplier will tell you they “do QC.” The question is what they measure, how often, and whether the data is retrievable by lot. Here is the program I require from any OEM vial manufacturer.
Incoming material inspection
- Glass tubing: certificate of analysis per lot, including hydrolytic resistance, expansion coefficient, and dimensional check on OD and wall thickness (tubing OD 12.0 mm ± 0.15 mm for 2 mL vials).
- Silicone sheet: durometer check (45 to 55 Shore A), thickness check (1.0 mm ± 0.05 mm), and a cure check by solvent swell or FTIR.
- PTFE film: thickness (0.05 to 0.13 mm depending on grade) and a pinhole test by spark tester.
- Resin (caps): melt flow index per lot to confirm the grade has not been swapped.
In-process and final inspection
The dimensional audit should run at a defined frequency, typically every 2 hours during a molding run, with a sample size of at least 10 vials per cavity on a multi-cavity tool. That last point matters: a 16-cavity mold has 16 independent failure modes, and a supplier who only pulls from cavity 1 is not auditing the tool.
Final inspection should include:
- Dimensional check on all critical dimensions per the drawing, with Cpk reported (target Cpk ≥ 1.33 on body OD and neck ID)
- Visual inspection for chips, cracks, and foreign matter under 500 lux minimum
- Septum puncture test (minimum 3 punctures, no coring)
- Closure torque test (0.4 to 0.6 N·m)
- Leak test (dye immersion or pressure decay) on a defined AQL
- Extractable test on a defined sampling plan: run a blank on a representative sample by HPLC-UV at 210 nm and 254 nm, and require no peak above the method LOQ in the retention window of interest
That last test is the one that separates real OEM suppliers from relabelers. A vial that looks perfect but leaches a plasticizer at 0.8 ppm will ruin a method validated to 0.1 ppm. If the supplier cannot run an extractable blank, they cannot support a regulated method. This is also where an independent Analytical Testing lab is worth the spend on a first article: get a third-party extractables screen before you commit to a tool.
OEM capability: what to ask before you sign
OEM capability is not just “can you put my logo on the box.” It is the ability to hold your drawing, your material spec, and your traceability requirements across the life of the program. Here is the checklist I use.
Tooling and drawings
- Do they own the tool, or will they? Tool ownership should transfer to you on payment, with a written clause that the tool cannot be used for other customers.
- Can they produce a first article inspection (FAI) report to AS9102 or an equivalent format, with every dimension on the drawing measured and reported?
- What is the tool maintenance interval, and what is the change control process if they modify the tool?
Traceability and documentation
- Lot traceability from glass tubing lot to finished carton, retrievable within 24 hours.
- Certificate of conformance per shipment, with the actual measured values, not just “pass.”
- Retention samples held for the shelf life of the product (typically 5 years for a regulated program).
- Change notification: a written commitment to notify you 90 days before any change to material, process, or sub-supplier.
Regulatory support
If your vials go into a pharma or environmental method, the supplier needs to support you on USP <660>, USP <661> (plastic packaging), and, for environmental work, the relevant U.S. EPA SW-846 test methods. SW-846 Method 5030 and 8260 in particular are sensitive to vial and septum contamination, and the method blanks will catch a bad lot fast. A supplier who has never heard of Method 5030 is not qualified to supply vials for volatile organics work.
Comparison: catalog relabeler vs. real OEM manufacturer
Here is the decision checklist I actually use, with the numbers that matter. Score each row and walk away from any supplier that fails more than two.
- Glass type declared per lot: Type I borosilicate with USP <660> hydrolytic resistance ≤ 0.1 mL 0.01 M HCl (pass) vs. “borosilicate” with no test data (fail).
- Septum durometer: 45 to 55 Shore A with test data (pass) vs. no durometer spec (fail).
- Septum puncture count: ≥ 3 clean punctures with coring test data (pass) vs. “unlimited” claim (fail).
- Body OD tolerance: 12.0 mm ± 0.1 mm with Cpk ≥ 1.33 (pass) vs. ± 0.3 mm or no Cpk (fail).
- Thread standard: GPI 9 mm conformance declared (pass) vs. “fits standard autosamplers” (fail).
- Dimensional audit frequency: every 2 hours, all cavities sampled (pass) vs. once per shift, one cavity (fail).
- Extractable blank: HPLC-UV at 210 and 254 nm, no peak above LOQ (pass) vs. not performed (fail).
- Lot traceability: retrievable within 24 hours (pass) vs. “we can look into it” (fail).
- Change notification: 90 days written (pass) vs. none (fail).
- Tool ownership: transfers to buyer, single-customer use (pass) vs. supplier-owned, shared (fail).
If you are comparing against instrument-vendor consumables, it also helps to know what the majors publish. Agilent chromatography consumables and columns and Thermo Fisher chromatography and sample handling both publish dimensional and material specs for their vials; use those as the benchmark when you write your own drawing. Restek technical resources for chromatography are also useful for understanding how septum choice affects GC inlet performance.
Troubleshooting checklist: when the vials are the suspect
When a method starts drifting or a blank shows a ghost peak, work through this list before you blame the column. I have solved more “column” problems with this checklist than with any column replacement.
- Ghost peaks in the blank at a consistent retention time: run a blank with no vial (septum only) and a blank with a new lot of vials. If the peak disappears with the new lot, the septum or glass leachate is the source.
- “No vial detected” or “vial height error”: measure body OD and height on 10 vials from the failing tray. If any exceed 12.1 mm or 32.3 mm, the lot is out of spec.
- Needle coring (visible silicone fragments in the sample): check septum durometer and puncture count. If the septum is under 40 Shore A, it will extrude and core.
- Evaporation loss over a 24-hour run: check cap torque. Below 0.3 N·m, solvent loss is measurable on volatile analytes.
- Cross-threading on screw caps: check thread pitch against GPI 9 mm. A 0.1 mm pitch error will cross-thread at 0.5 N·m.
- pH drift in aqueous standards: check glass type. Type III soda-lime will shift an unbuffered standard by 0.5 pH units within a week.
- Inconsistent peak area (RSD > 2% on a method that should be < 1%): check septum lot change. A durometer shift from 50 to 60 Shore A changes the injection volume reproducibility.
If you run through this list and the vials pass, the problem is upstream. If they fail, you have your answer and you have a supplier conversation to have.
What I recommend
For a regulated HPLC or GC program, specify USP Type I borosilicate glass, 1.0 mm silicone/PTFE laminate septa at 45 to 55 Shore A, GPI 9 mm thread, and body OD 12.0 mm ± 0.1 mm with Cpk ≥ 1.33. Require a first article inspection, an extractable blank at 210 and 254 nm, and 90-day change notification in the supply agreement. Audit the supplier’s dimensional frequency and confirm they sample every cavity.
For a supplier, I look for a vertically integrated manufacturer that controls glass conversion and septum compounding, not a relabeler. If you want to see what that looks like in practice, the technical team at Aijiren publishes their material and QC specifications, which is a useful benchmark when you are writing your own drawing. The difference between a supplier who can show you the batch record and one who cannot is the difference between a program that runs for five years and one that gets re-sourced every eighteen months.
The cheapest vial on the quote is almost never the cheapest vial in the method. Factor in the analyst time for a re-validation, the cost of a failed batch, and the risk of a method deviation, and the premium for a real OEM manufacturer pays back inside the first quarter. Buy the drawing, the material cert, and the audit data. The carton is the easy part.
References & further reading
Related resources from our lab consumables network:
- Oem Vial at oemsamplevials.com
- Vial Closures at vialclosures.com
- Analytical Testing at labanalyticaltesting.com
- Aijiren at aijirentechinc.com
External references and standards: