
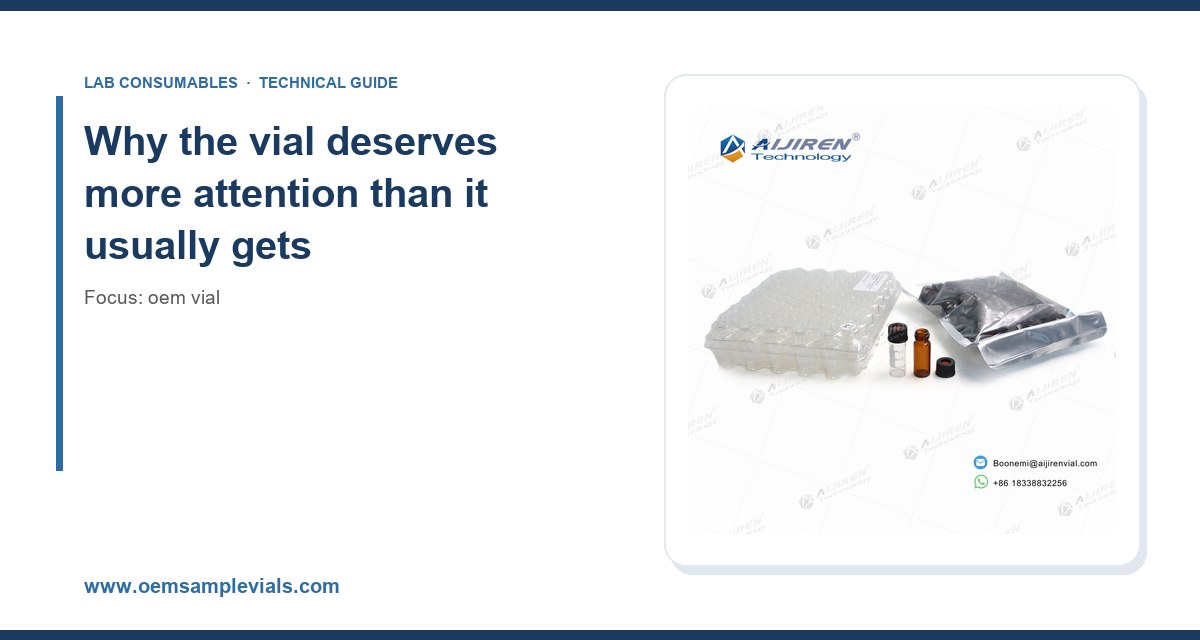
I have spent more years than I care to admit standing in front of a rack of autosampler vials, watching a run fail because someone bought the wrong cap. The vial is the cheapest component in the entire analytical chain and the one most likely to quietly ruin a sequence at 2 a.m. This guide is what I tell procurement and lab staff when they ask how to buy OEM vials without getting burned: the dimensions that actually matter, the septa chemistry, the cap torque, and the failure modes that cost you a re-run.
A 2 mL vial costs pennies. A failed sequence on an HPLC costs hours, a re-prep of standards, and sometimes a client. The vial sits between your sample and a detector that can resolve parts per billion, and it does three jobs at once: it holds a known volume, it seals that volume against evaporation and contamination, and it presents the sample to a needle at a fixed geometry. Get any of those wrong and the data is wrong before it reaches the column.
The problem is that vials look interchangeable. They are not. Two vials that both say “2 mL clear glass, 12 x 32 mm” can differ in glass expansion coefficient, neck finish, bottom geometry, and the flatness of the sealing surface. I have seen a batch of no-name vials with neck IDs varying by 0.3 mm cause needle bends on a autosampler that had run clean for two years. The instrument got blamed. The vials were the cause.
So treat the vial as a specified component, not a commodity. That means writing a specification, matching it to your instrument and method, and buying from a supplier who can hold that specification batch to batch. The rest of this guide walks through how to do that.
The core specification: what “2 mL vial” actually means
Most of the industry works to a de facto standard derived from the original autosampler designs. The common format is 12 x 32 mm outside dimensions with a 2 mL nominal capacity, a 6 mm neck opening, and a 8-425 or 9 mm screw thread depending on the family. Those numbers are not decorative. The autosampler tray, the gripper, and the needle guide are all built around them.
Dimensions and tolerances that matter
- Body diameter: 12.00 mm nominal, typically held to +/- 0.2 mm. Oversize bodies jam in the tray; undersize bodies wobble and the needle misses the septum center.
- Height: 32 mm nominal. Height variation changes the needle penetration depth. A 0.5 mm taller vial with a short needle can mean the needle tip sits in the headspace instead of the liquid.
- Neck ID: 6.0 mm for standard 2 mL. This is the dimension I check first when a needle bends. Anything under 5.8 mm is a reject.
- Neck finish: 8-425 (8 mm thread, 425 glass finish) or 9 mm for the wide-mouth families. The thread pitch and the sealing land must match the cap.
- Bottom geometry: flat, conical, or rounded. Conical bottoms recover low volumes (down to 50 to 100 microliters with a properly positioned needle); flat bottoms are easier to clean and better for stir bars.
If you want the full dimensional envelope and the glass grades on offer, the OEM vial range at oemsamplevials.com lists the tolerances per family, which is more than most catalog pages bother to do.
Glass: clear, amber, and the silanization question
Clear borosilicate (Type I, USP) is the default for UV-visible detection and for anything where you need to see the meniscus. Amber glass blocks light below about 500 nm and is the right choice for photosensitive analytes: vitamins, some pesticides, and a long list of pharmaceutical actives. The trade-off is that you cannot visually check for bubbles or particulates, so amber users should be running a blank check more often.
The third option, and the one buyers forget, is surface treatment. For basic analytes that adsorb to glass (amines, some peptides, certain drugs at low concentration), a silanized or deactivated surface reduces loss. I have measured recovery differences of 15 to 30 percent on low-level amine standards between untreated and silanized vials. If your calibration curve is flat at the low end and your QC fails, check the vial before you blame the column.
Closures: where most vial problems actually live
Ask any chromatographer where their vial failures come from and the honest answer is the closure, not the glass. The cap has to do three things: hold the septum flat against the sealing land, survive the autosampler gripper, and let the needle through without coring. Each of those has a number attached.
Screw caps, crimp caps, and snap caps
- Screw caps (8-425 or 9 mm): Reusable, no tooling, and the right default for most labs. The catch is torque. Under-torque and the septum lifts under headspace pressure; over-torque and you deform the septum and create a leak path or crack the neck. I specify 0.5 to 1.0 N·m for 8-425 caps and check with a torque screwdriver on a sample of ten per lot. Hand-tight is not a specification.
- Crimp caps (11 mm or 20 mm): The best seal for long sequences and for headspace GC, because the aluminum crimp compresses the septum to a controlled depth. The cost is tooling and a decapper. Crimp height matters: too tall and the seal leaks, too short and you crush the septum. A crimper set to the manufacturer’s gauge, checked weekly, avoids most of this.
- Snap caps: Fast, no tooling, popular on high-throughput clinical lines. The seal is less consistent than crimp and they are not reusable. Fine for short runs, risky for a 96-hour stability study.
Matching cap to vial is where buying from one source pays off. The Vial Closures catalog at vialclosures.com is organized by neck finish and septum, so you can spec the pair together rather than guessing whether a 9 mm cap fits your 8-425 vial (it does not).
Septum chemistry: the decision that drives your blank
The septum is a disc of elastomer, usually 1.0 mm thick for 8-425 and 9 mm caps and 3.0 mm for 11 mm crimp. It is pierced by the needle, reseals, and then sits in contact with your sample and its headspace. Its composition determines what leaches into your blank and how many injections you get before it leaks.
- Silicone (pure): Excellent reseal, high puncture count (I have run 50 to 100 punctures on a good silicone septum), but it is permeable to gases and can shed particles. Good for aqueous samples, poor for volatile organics over long runs.
- Silicone/PTFE faced: The PTFE face on the sample side stops the silicone from contacting the sample. This is the workhorse for HPLC. Puncture count drops to roughly 20 to 30 before the PTFE is compromised, so change caps on long sequences.
- Butyl rubber: Low gas permeability, good for headspace and for samples that must not lose volatiles. Reseal is poorer and puncture count is lower, typically 10 to 20.
- PTFE/silicone/PTFE sandwich: The most inert option for aggressive solvents and trace analysis. Higher cost, and the extra layer can make needle penetration stiffer on some autosamplers.
If your method blank shows siloxane peaks on GC-MS at m/z 73, 147, or 207, the septum is the first suspect. Switching to a PTFE-faced septum and pre-conditioning new caps at 100 to 120 °C for 30 minutes before use removes most of that background.
Matching the vial to your instrument and method
This is the step buyers skip. The vial is not chosen in isolation; it is chosen for a specific autosampler, a specific detector, and a specific sample volume. Get the pairing wrong and no amount of glass quality saves you.
Autosampler compatibility
Agilent, Waters, Shimadzu, and Thermo autosamplers all use the 12 x 32 mm footprint but differ in gripper geometry, needle depth, and tray clearance. The Agilent chromatography consumables documentation is a good reference for the dimensional envelopes their trays accept, and it is worth reading even if you run another brand, because the tolerances are similar across the industry. The Thermo Fisher chromatography and sample handling pages cover their vial and cap families the same way.
Two practical checks before you commit to a lot:
- Run a tray of ten vials through a dummy sequence and watch the gripper. Any hesitation or double-grab is a diameter problem.
- Check needle depth against the bottom geometry. A conical vial with a needle set for a flat bottom will hit glass. Adjust the needle stop, not the vial, unless you have a reason.
Sample volume and recovery
Standard 2 mL vials are happiest between 0.5 and 1.5 mL. Below 0.5 mL you are into the conical-bottom and insert territory, and the needle position becomes critical. Above 1.5 mL you risk overflow when the cap goes on and, in headspace work, you change the phase ratio and therefore the partition coefficient. If your method was validated at 1.0 mL, run 1.0 mL.
For micro-volume work, use a 150 to 300 microliter insert in a standard vial rather than a small vial. Inserts keep you on the standard footprint, which means no tray changes and no new needle geometry. The recovery on a properly seated insert with a conical bottom is over 90 percent at 50 microliters, which is good enough for most LC-MS work.
A buying checklist with real numbers
Here is the checklist I hand to procurement. It is deliberately numeric so that a supplier either meets it or does not.
- Dimensions: 12.00 x 32.00 mm, body diameter tolerance +/- 0.2 mm, neck ID 6.0 mm minimum 5.8 mm.
- Glass: Type I borosilicate, USP <660> compliant, clear or amber as the method requires.
- Capacity: 2 mL nominal, usable 1.5 mL.
- Closure: 8-425 screw or 11 mm crimp, matched to the vial family, septum specified by chemistry and thickness (1.0 mm standard).
- Torque (screw caps): 0.5 to 1.0 N·m, verified on ten caps per lot with a calibrated torque driver.
- Septum puncture rating: minimum 20 punctures for PTFE-faced silicone, 50 for pure silicone, stated by the supplier.
- Background: GC-MS blank at m/z 73/147/207 below the method detection limit after the supplier’s stated conditioning.
- Certificate: certificate of analysis per lot with dimensions, glass type, and septum chemistry.
- Packaging: cleanroom-packed or at minimum double-bagged, with a lot number traceable to the CoA.
Run this checklist against any quote and you will find that half the “cheap” options fail on two or three lines. The cost difference between a compliant vial and a non-compliant one is usually a few cents per unit. The cost of a failed sequence is not.
Decision table: which vial for which job
- Routine HPLC, UV detection, aqueous samples: 2 mL clear glass, 8-425 screw cap, PTFE-faced silicone septum, 1.0 mL fill.
- LC-MS, trace analytes, low-level amines: 2 mL clear glass, silanized, 9 mm screw cap, PTFE/silicone/PTFE septum, conditioned before use.
- Headspace GC: 20 mL headspace vial, 20 mm crimp cap, butyl or PTFE-faced silicone septum, crimped to gauge.
- Photosensitive compounds: 2 mL amber glass, same closure as the routine method, blank-checked more often because you cannot see the sample.
- Micro-volume (under 200 microliters): standard 2 mL vial with a 300 microliter conical insert, needle depth adjusted to the insert.
Operational precautions that save sequences
Buying the right vial is half the job. The other half is handling it the same way every time. These are the practices I enforce in my own lab because each one has cost me a run at some point.
Before the run
- Condition new caps. Heat PTFE-faced septa at 100 to 120 °C for 30 minutes and let them cool in a clean container. This alone cut my GC-MS siloxane background by more than half.
- Inspect a sample of every lot. Ten vials from each box, checked for neck ID with a go/no-go gauge and for height with calipers. Reject the lot if two fail.
- Torque to spec. A torque screwdriver is a 40-dollar tool that prevents a class of leaks you will otherwise chase for weeks.
- Fill to the validated volume. Mark the fill line on your SOP and stick to it. Headspace volume changes the phase ratio and the peak area.
During and after the run
- Change caps on long sequences. PTFE-faced septa are good for about 20 to 30 punctures. A 96-injection sequence with the same cap is asking for a leak in the last third.
- Watch for needle coring. A silicone plug in the needle shows up as a sudden pressure spike or a ghost peak. If you see it, change the septum and check the needle bevel.
- Store prepared vials cold and capped. Evaporation through a poorly seated septum over 24 hours can shift a concentration by several percent, enough to fail a stability criterion.
Troubleshooting checklist
When a sequence misbehaves and the vial is a suspect, work through this in order. It is faster than swapping components at random.
- Ghost peaks or rising baseline on GC-MS: septum bleed. Check m/z 73/147/207, replace with conditioned PTFE-faced septum, re-run the blank.
- Low recovery on basic analytes: adsorption to untreated glass. Switch to silanized vials and compare recovery on a spiked standard.
- Needle bends or autosampler errors: neck ID or height out of tolerance, or the wrong tray insert. Gauge ten vials and check the tray seating.
- Peak area drift across a sequence: evaporation through a loose or over-torqued cap. Check torque, check fill volume, check septum condition.
- Leaks in headspace vials: crimp height wrong or septum crushed. Re-gauge the crimper and re-crimp a test set.
- Particulates in the injection: septum fragments or glass shed from the neck. Inspect the vial before loading and filter if the method allows.
If the checklist does not resolve it, the problem is probably upstream of the vial. That is when it pays to have a partner who can run the failure analysis for you. The Analytical Testing services at labanalyticaltesting.com can characterize leachables, septum background, and dimensional non-conformance on a suspect lot, which is cheaper than a week of guessing. For method development questions, the Restek technical resources are a solid reference on septa and inlet effects, and the U.S. EPA SW-846 test methods set the QC expectations many environmental labs work to, including the blank and duplicate frequencies that will catch a bad vial lot early.
Working with an OEM supplier
Buying OEM means the supplier manufactures to your specification rather than reselling a catalog item. That is worth having when your method is validated and you cannot afford lot-to-lot drift. The questions to ask are straightforward: can you supply a CoA per lot with the dimensions and glass type, can you hold the neck ID to 5.8 mm minimum, and can you quote the septum chemistry and puncture rating in writing?
Aijiren is one of the manufacturers I have worked with on custom vial and closure programs, and the reason is simple: they will put the tolerances in the specification and then meet them. That is rarer than it should be. When you evaluate any OEM, ask for three consecutive lot CoAs and compare the neck ID and height data. If the supplier cannot produce them, keep looking.
One more procurement note. Do not let a purchasing system substitute a “compatible” vial from another vendor mid-method. I have watched an ERP system swap a validated vial for a cheaper equivalent and take a validated method out of control for a month before anyone traced it. Put the vial specification on the approved-item list with the same rigor as the column.
Takeaway
The right OEM vial is a specified component, not a commodity. Fix the dimensions (12 x 32 mm, 6 mm neck, 8-425 or 9 mm finish), choose the glass and septum chemistry for your detector and analyte, torque screw caps to 0.5 to 1.0 N·m, condition new septa, and replace caps before the puncture rating runs out. Write those numbers into the purchase specification, demand a CoA per lot, and check ten vials from every box. Do that and the vial stops being the thing that fails at 2 a.m. It becomes the part of the workflow you never think about again, which is exactly what you want from the cheapest component in the chain.
References & further reading
Related resources from our lab consumables network:
- Oem Vial at oemsamplevials.com
- Vial Closures at vialclosures.com
- Analytical Testing at labanalyticaltesting.com
- Aijiren at aijirentechinc.com
External references and standards: